How to Center Embroidery Designs (8 Placement Tips!)
This post may contain affiliate links, which means I’ll receive a commission if you purchase through my links, at no extra cost to you. I sometimes receive free products for review. Please read disclosure for more information.
Tired of embroidering crooked designs in the wrong places? Not sure how to align embroidery designs on your blank?
I’ve embroidered my share of doozies over the years! Thankfully, trial, error, and experience have taught me how to center machine embroidery designs without frustration.
While some high-end embroidery machines have lasers and cameras to assist with perfect design centration, my machine isn’t that fancy, so I had to master the technique the old-fashioned way.
Want to learn more? Here are my favorite tips for lining up and centering embroidery designs on blanks like t-shirts, towels, and more.

How to Center Machine Embroidery Designs
First, I’ll cover how to find the center of your hoop’s embroidery field and basic tips for design placement. Then, I’ll move on to how to decide where to place the design, mark blanks, and finally, center an embroidery machine over the hoop.
1. How to Find the Center of Your Hoop
For many embroidery machines, the hash marks on the sides of the hoop may not indicate the exact center of the embroidery area.
Thus, knowing how to find the true center of your hoop’s embroidery area is the first step to lining up embroidery designs perfectly.
Finding the center is especially important when you need to embroider a design close to the same size as the maximum embroidery field. In this case, if you don’t position the marked blank in the exact center of your embroidery area, you will have to rehoop the fabric rather than use your machine to move the design.

As an example, above is my Brother embroidery machine’s hoop with its plastic template. All machine hoops should come with a plastic template. (If yours doesn’t, it is a great investment!)
The grid marks the exact embroidery field available and its center point. However, notice how the vertical center of the grid is almost 3/8″ off from the vertical hoop notch!
Thus, you need to line up embroidery designs with the center of the template grid, not with the hoop notches.
One way to remember the true center without having to get out your template every hooping is to mark the sides of your hoop with permanent marker or fingernail polish.
2. General Rules for Design Location and Centration
Now, if you’re looking for the standards for design placement, here are two different guides I recommend:
These standards provide suggested locations when you go to line up embroidery designs on common blanks like towels, onesies, bibs, shirts, and more.
They’re just suggestions, though, for a starting point rather than an actual rule.
3. Helpful Placement Tools for Embroidery Designs
If you don’t want to measure using placement standards, many helpful placement tools are available!
These are not necessary but are great if you embroider items in bulk and want to save time measuring.
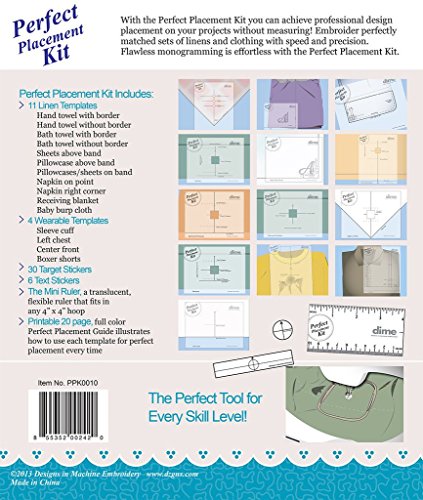
I highly recommend the Perfect Placement Kit (shown above; there’s also a children’s version.)
These nifty “cheater” templates guide you in determining embroidery design placement based on industry standards.

If you’re looking to center embroidery designs on t-shirts only, you could also consider the Embroidery Placement Ruler or a set of templates like the Embroiderer’s Helper.

I also have a set of 4 different sizes of the above basic alignment templates, which are simple but work well enough for my occasional t-shirt embroidery needs.
So take a look around and see if there are any embroidery positioning aids for your favorite blanks to help make the job easier!
4. Other Design Placement Tips
A simple ruler or measuring tape can help you mark the design location if you aren’t using a design placement aid.
Either that, or you can use your plastic template. Place it over your blank and use your favorite marking utensil to extend the grid lines at the center point. Then, you can go back and connect them with a ruler.

And, if you need something centered, don’t forget that folding a blank like a t-shirt in half is an easy way to make a crease at the center.
If at any point you’re unsure what your design will look like on your embroidery blank, print a template! There is nothing to lose by rechecking design positioning before marking and embroidering.
Printing and using templates is also especially important when it comes to positioning multiple embroidery designs on one blank.

Templates can be printed using almost any embroidery software. (If you don’t have software, check out these best free embroidery software options to grab one.)
Make sure you print the template with its grid and centration lines if you plan to use it to help center the design.

Once you’ve printed your template, you can place it over your embroidery blank to easily visualize what the finished product will look like!
If you tape it on with masking tape, painter’s tape, or embroidery tape, you can then use it to center your blank in your hoop without having to mark it.
Also, sometimes embroidery designs will look best placed at an angle. One of my quirks is to rotate my embroidery designs in software rather than rotate my blanks.
5. Tools for Marking Embroidery Blanks
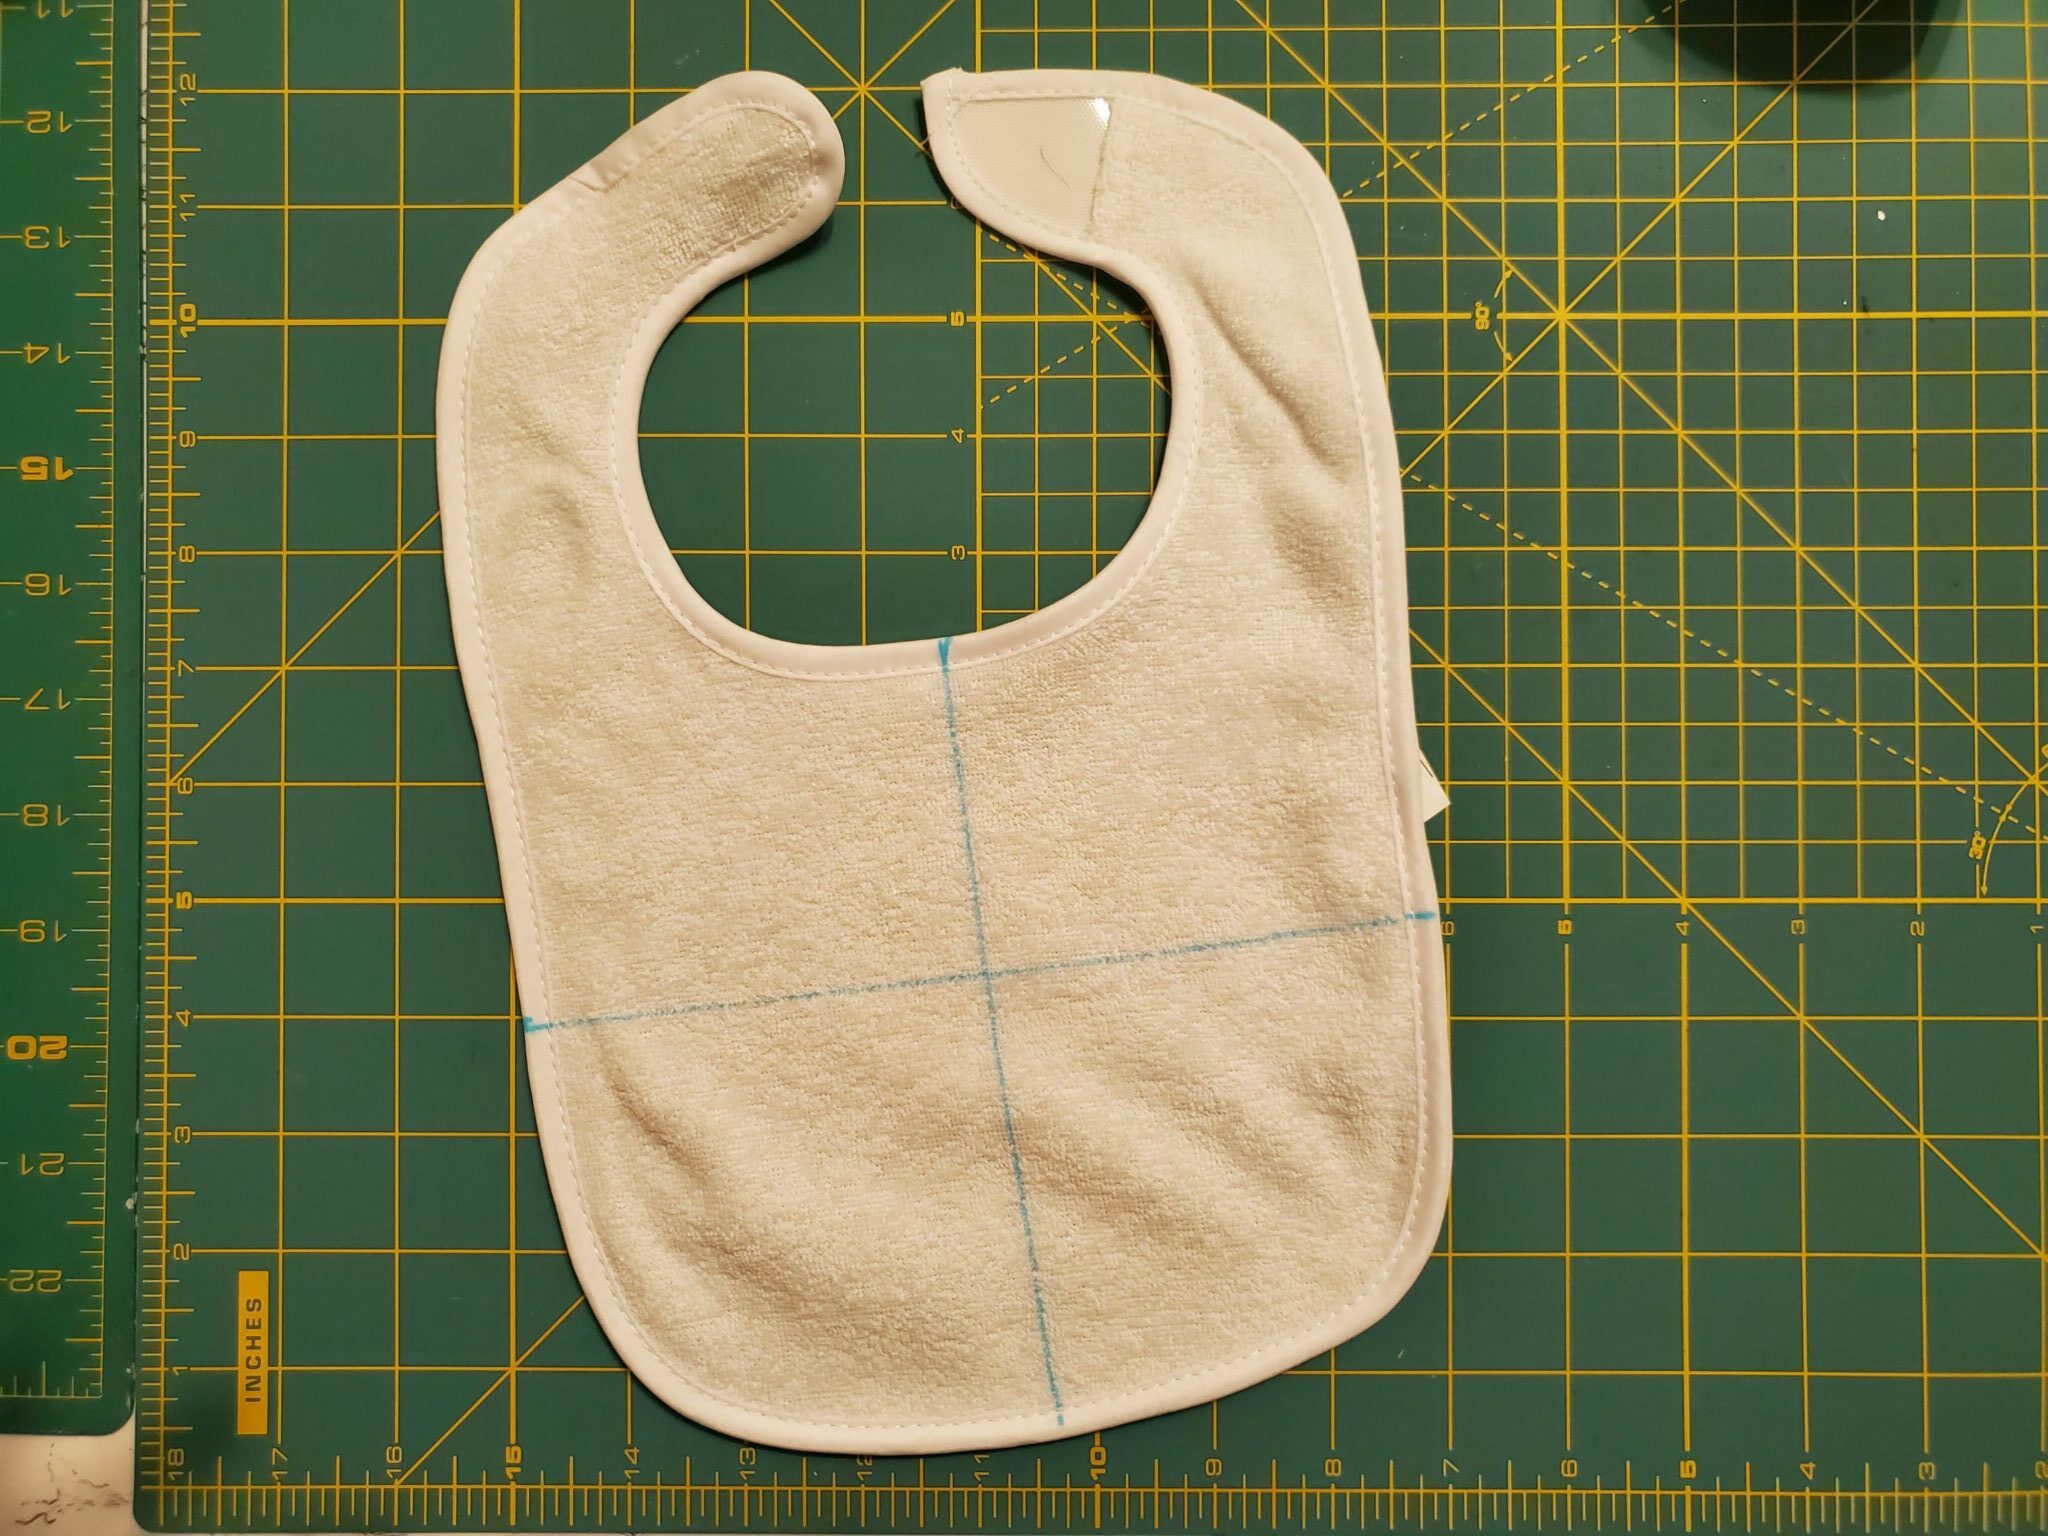
Unless you have a template taped on, you need to mark your blank where you’ve decided to align your embroidery design.
There are plenty of tools for marking in sewing and embroidery, but my favorites are:
- Water- or air-soluble fabric marking pens
- Chalk wheels for darker fabrics
- Embroidery target stickers (Learn about using target stickers on difficult-to-mark blanks!)
Now, always make sure to mark long, straight lines at right angles to each other. Longer lines will be easier to line up with the center of your hoop.

If using target stickers, make sure to place them directionally with the arrow pointing to the top.
6. Keeping Designs and Blanks Centered While Hooping
I always prefer to hoop fabric when possible as this results in better outcomes for me.
There are many different techniques for hooping fabric, but the main goal is to get the marked design’s center lined up with the marked center of the hoop’s embroidery area.
I find it helpful to first adhere my stabilizer to my blank using a light layer of Odif 505, which makes for fewer moving parts during the hooping process.
Also, sometimes it’s helpful as a beginner to tape your plastic template over the front of your blank, and use this to guide you when hooping.
Thankfully, if your hooping isn’t perfectly lined up and you are using a design smaller than your hoop size, you can adjust for this later using your machine’s interface.

If you need perfection when hooping, consider purchasing a PAL from dime. I use my Perfect Alignment Laser to center blanks in my magnetic hoops and when floating.
7. Centering Blanks and Designs When Floating Fabric

If you plan to float the fabric on top of a piece of stabilizer, one helpful tip is to mark the center of the embroidery area with a pencil first.
Then, fold your blank in half (if it’s easy to isolate a single layer) and lay it along the corresponding straight line. Unfold the blank gently over the rest of the stabilizer, and press it down.
I’ve found that sticky, self-adhesive tear-away stabilizer is my favorite for getting the best placement during floating.
8. How to Center the Embroidery Machine and Hoop

If you don’t hoop your design perfectly in the center of your hoop, in most cases, that’s okay!
Modern embroidery machines have touchscreen interfaces where you can move the hoop around to make the needle line up with the center of your marked blank. Some high-end machines even adjust the needle position for you.

For instance, on my Brother embroidery machine, you can press “Move” after loading the design and change the location of the design relative to the hoop area.
On many machines, you can also change the angle of the design. (“Rotate” if you hoop your blank crooked.)
So again, not all hope is lost! Refer to your manual to figure out how to center the embroidery hoop on your embroidery machine.
Also, make sure to always remove paper and plastic templates before starting to embroider, and ensure your design on the machine is oriented in the correct direction.
Conclusion
And that’s it! Mastering how to center machine embroidery designs will go a long way in preparing you for success when you are learning how to use your embroidery machine!
what a perfect tutorial have learnt a lot aftering this tutorial, so i am saving it on my computer to refer to it again and again thank you soooo much
Thanks! Glad it was helpful!
Great tutorial! Thanks! Do you have any instructions on how to embroider on a denim pant leg?
Thanks! Sorry, I don’t have that specific tutorial!